Pages

Wednesday, June 19, 2013

My Sewing Studio


I have been asked a few times how I set up my sewing space and where I got items I am using. Time for show and tell with photos and links.  
Please note any link I am sharing is only one place, most items are available everywhere.

First when my son moved into his own home we removed the rugs and put in hardwood floors.  I prefer this for my sewing studio as it shows every thread or item dropped, I like my space clean and open.  I did put an area rug in the center to cut down on sound, it would be too hollow with nothing to absorb as I also don’t have curtains in this room.  I had blinds put up instead for a few reasons. This room gets afternoon sun so I can tilt the slats and when I sew in the morning I like the blinds completely open.  Blinds are also easy to dust (vacuum) as long as you keep up with it.  When sewing quilts with 100% cotton batting it floats in the air and lands on everything looking like dust.  Since I completely clean the room after each project it’s easily removed. I keep a mini shop vac in the room right next to my machine and it gets used every day.

Luggage travel cases for the Ruby, embroidery arm and the Sew Steady table.  This shelf holds my sketch book, plastic sleeve with loose pages printed from Craftsy classes and a photo album.  The shelf has hooks for small rulers and templates.
The first picture shows my two 10 drawer carts, they have wheels and a metal tray on the top. This way items I use all the time are within reach.  Picture in the middle shows my bags of scrap batting that is the extra from quilts I have made, big enough for another project.  I keep 2 boxes for stabilizer, it is needed when doing machine embroidery.  A bag of plastic bags and tracing paper for transferring designs onto quilt tops. There is also always an empty box used for sorting.  While I sew scraps go into the box and are sorted by size later.  Leaning against the cart are my Steady Betty for ironing projects under 15”, square rulers and my spinning cut mat.  The last picture is the top of one of my 10 drawer cards.  With the tops being metal I have placed a small cookie sheet with magnets on the bottom on one giving the top an edge.  The other I have small cups with clear lids that have magnetic bottoms.  These hold items like snaps, D rings, safety pins, clover mini wonder clips, straight pins and buttons. The two mugs hold zippers, pens and pencils.  I keep several erasable Fixion pens on hand, ones that have not been used yet I keep in a plastic baggie as back up when another empties.


The first picture is a standing light, I put leftover fabric strips that were pieced and pressed for binding.  On the curved part of the light are my hoops in 5 sizes for the embroidery machine and a free motion frame which is not on the market yet from a class I went to for Linda Hall . The middle picture is a bag I keep next to the table for scraps that are cut off as I square up quilts.  Most is too small for major projects but work well for my little cases.  The last picture is taken under the first card table.  It has a plastic tub with extra fabrics, the embroidery attachment, a stool and my garbage can.
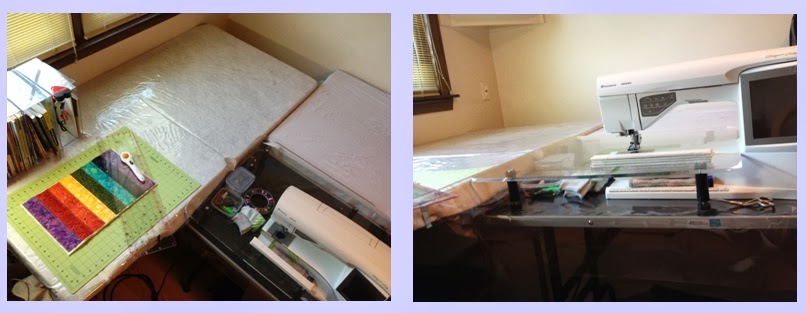
This picture is taken to show the layout of my space where I sew.  There are 3 standard size card tables covered with a table cloth and topped with clear plastic.  The plastic makes it easier for the quilts to slide while top stitching.  The table for the sewing machine is an adjustable height table.  It took some time to find a table that would go down to 24" - this is necessary to bring the sewing surface to the right height.  I have 4 plastic boxes on the table to hold books, manuals and the 5D / Quilt Design dongles needed to create embroidery designs. My machine has a Sew Steady acrylic table which I love.  Under the clear table are containers holding the walking foot and small items I like handy and my machinagers.  Under the sewing machine arm is a fleece cloth used to dust the machine as I sew.

In the closet is a sweater type storage hanger, the first shows the completed quilts currently for sale.  The second is how they are actually stored, with tissue wrapping each.  Small items are individually wrapped and are hanging in the bags.
My Ironing board often holds my current project I am working on and the hangers I use to display quilts as I work on them.  The next is a quilt hung with the hangers, with these I can view the big picture and decide if I need to make any changes.

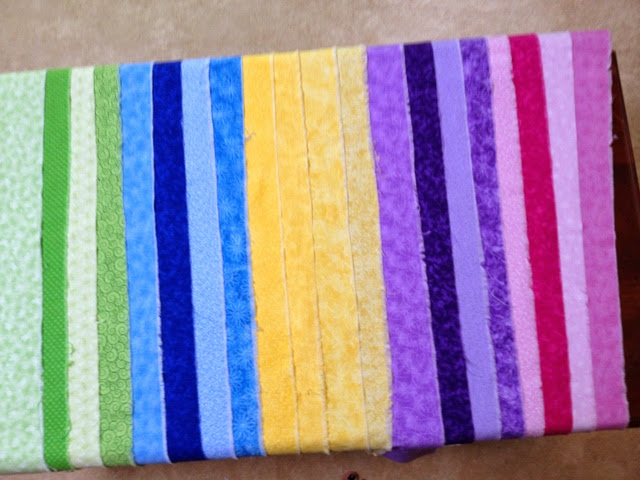
Lastly right next to the sewing table is a large tote with new fabrics (Quilt Store) and a smaller with the cut pieces I am using currently.  I like the boxes so I can close them at the end of my day.  The dresser was my daughters; it now holds sorted and organized fabrics, stabilizers, trims and accessories.  The top drawers are full of what I need to pack and wrap items purchased.  My embroidery threads are displayed on the wall; they are kept separate from my cotton threads. These are polyester and rayon, the strength is needed for machine embroidery.  I covered an old cork board for my room; it has magnets to hold my small scissors, the board has pins, prairie points  hold my glue and pens. A small refrigerator  holds bottled water with my sprays for ironing on top. The white box is for all my receipts and bill of sale. 

The only thing I am missing is a vision/display board, that will be next and will go behind the couch.  It’s the perfect space, for now I love the whole room

What fun must haves do you need in your sewing space?


Thursday, June 13, 2013

Summer time

My favorite time to sew was always summer.  From the time my daughter was very small I made clothes for her.  Little girls clothes are cute and easy to sew, fabrics always came in multiples of matching/coordinating options to choose from. 

As my children grew most of my sewing for them was Halloween costumes, never did they ever have a costume from a store that came in a box and never did they ask for one.  They did get to choose what they wanted to be as they grew older.  Over the years they were a pink Care Bear, Bert from Sesame Street. a Hershey Kiss, Witch, Clown, Zorro, Alf,  Merryweather (the fairy from Sleeping Beauty who watched over Aurora) and a butterfly.  I still have most of these costumes

Sewing and designing came in handy when my daughter joined one of her favorite cousins in what later became competitive twirling.  I didn't even know our area had this until she was asked to join when they needed more flag people for a trip to Nationals which was held at Notre Dame. Doing so meant learning some basics, doing a few parades to raise money for the team and the trip.  She liked it so much she asked her cousins teacher to teach her too and she competed for the next few years wining title after title.  I loved making her gowns and costumes, trying to do something a little different each time.  Rumor has it they were still being used and passed on, as each child grows out of them.


With my children grown and on their own I still have my girls to sew for (besides quilting).  The "Golden Girls" Bella Rose and Isabel Zoe.  They are our 3rd and 4th golden and since our last golden Zoe Isabella liked her scarf when the Vet put one on her after a surgery I have been making them ever since.  They get them for every season, holiday and special occasion.  With the two of them Bella wears mostly pink and Izzie purples or green when purple isn't available to match Bella. 
When you have two its best to color code them so when they run in the back yard you know who is being chased and who is doing the chasing.  As long as it's even I let them play, it's what puppies do.

Tuesday, June 11, 2013

My design

For my very first quilt I designed I wanted it to be colorful.  I had a few quilt magazines I had picked up and literally spent hours reading.  I didn't see anything like I wanted but knew I wanted it accented with white to bring out the bright colors I had in mind.

Not knowing how this would turn out I made my way to the local chain fabric store to look over the choices.  I didn't want to use Quilt store fabrics although I knew by then the difference in quality and price.  (Quilt store fabric starts at about $11.95 a yard and goes up from there, it's also thicker with better dye intensity)

I could spend hours looking at fabric and that day was there for about 2 hours just in one section.  I left without buying anything but had in mind how many colors, fabrics and prints I liked. Before purchasing I needed to put the design that was forming in my head onto paper and organize it, I didn't want to make a scrappy quilt.  I took photos of the bolt ends where the information was of the ones I liked along with the price and designer.  This store has a website and there I knew I could look them up and see which ones had matching designs in alternate colors.  I wasn't looking to make it matchy matchy but wanted choices without taking 40 photos in the store although I would if I needed to.

Once home I opened up my Excel computer program (this is before I got EQ7) and started putting my design to paper. My colors were going to include blue, green, pink, purple and yellow along with the white.  


For my first quilt I didn't want it too complicated so I stuck with squares.  I did them in 2 sizes so it would be more than a patchwork quilt.  It took a few days organizing the colors and block sizes until I liked what I had, at least on paper.  I then started numbering them because each of the 5 colors I chose would have 4 different shades light to dark.  From here I estimated how much fabric of each color to buy and waited for this collection to go on sale (to $2 a yard)


It took a good month to do the top and then adding the batting backing and top stitching took another month.  With this one I did some machine embroidery adding dragonflies, butterfly's, hearts, flowers and loops. I used my endless hoop to create the outside embroidery.  


I love this quilt, I made it to fit a single bed as that's the size I take on vacation.  Not too little for a bed or too big to curl up on the couch with and everyone seems to love it as much as I do. 


Thursday, June 6, 2013

Tote, tote,tote

Last week I took time off from sewing for someone else and made a tote I had bookmarked as soon as my Quilter's World magazine arrived. 


This was a sew as you go project which I had not done before and really enjoyed. First I was surprised how much more thought went into deciding what fabrics to put on next.  I started with about 6 different fat quarters and added a few more as I went along. 
 
Magazine instructions
As I was completing it I decided to go off script from the pattern printed and added a few elements I wanted.  My thought was I wanted to use it for an everyday type bag when shopping so I don't have to get plastic bags at checkouts like Target or Walgreens. 

I added a rather large pocket in a different color so I could separate items I would keep in my purse.  A long fabric string with a loop to attach my zipper cases I carry- 1 for change and one for paperwork I dont want to krinkle like coupons.  I found 2 different zip clips I added so I could attach keys and such.

This project took almost as long as one of my quilts, you will not see it on my ETSY site- sorry.   The rest of the week Hubby was on vacation and we got a lot done outside in the gardens - fresh baby spinach anyone... I have a lot :)